 en
en  Español
 عربى
عربىHow to check if Quick Connector for Car Air Conitioning is working properly?
To check if a quick connector for car air conditioning is working properly, inspect it for physical damage, confirm the locking clip is fully seated, verify there is no refrigerant leakage, and test that the connector engages and releases correctly. Quick connectors on automotive AC systems join the high-side and low-side refrigerant lines to the compressor, condenser, and evaporator without requiring threaded fittings. A faulty connector can cause refrigerant loss, AC system failure, or — in severe cases — dangerous high-pressure refrigerant release. Most checks can be performed with basic tools, a refrigerant leak detector, and a manifold gauge set, and should be carried out whenever the AC system shows reduced cooling performance, unusual noises, or visible signs of oil contamination near the fittings.
Content
- 1 How AC Quick Connectors Work and Where They Fail
- 2 Safety Precautions Before Inspecting AC Quick Connectors
- 3 Step-by-Step Visual and Physical Inspection
- 4 Refrigerant Leak Detection Methods
- 5 Testing Connector Engagement and Release Function
- 6 Diagnostic Summary: Symptoms, Likely Causes, and Actions
- 7 When to Replace Rather Than Service an AC Quick Connector
How AC Quick Connectors Work and Where They Fail
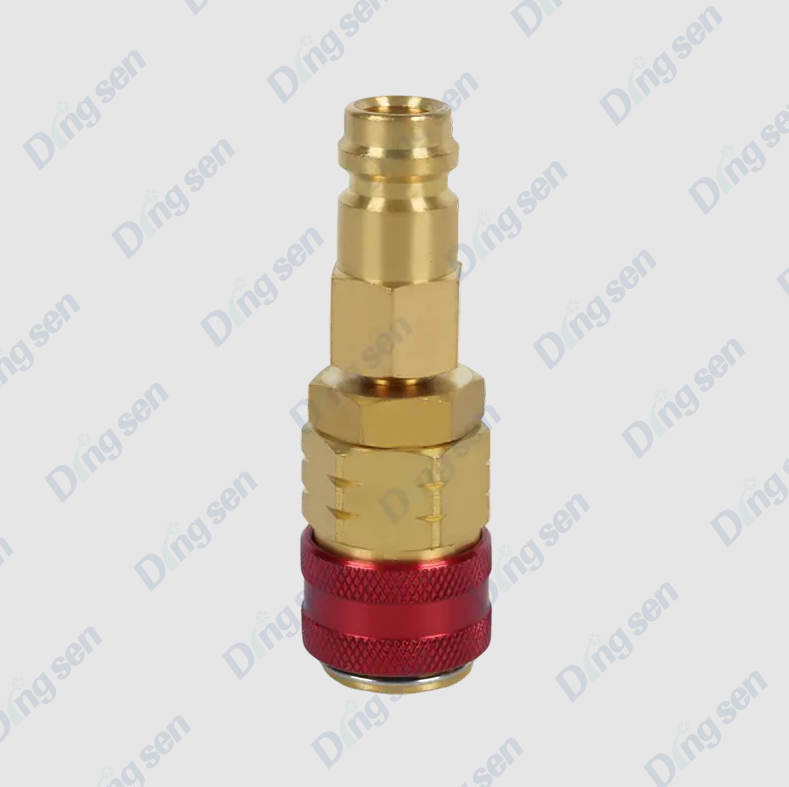
Automotive AC quick connectors use a spring-loaded internal valve and an external locking ring or clip to create a sealed, pressure-rated connection between refrigerant lines. When the male fitting is pushed into the female body, it depresses an internal Schrader-type valve, allowing refrigerant to flow. The locking clip snaps into a groove to prevent accidental disconnection under pressure — typically 15–30 bar on the high side and 2–5 bar on the low side of a standard R-134a or R-1234yf system.
The most common failure points are:
- O-ring seal degradation — the internal O-ring hardens, cracks, or swells over time, allowing refrigerant to seep past the seal.
- Locking clip damage or loss — a missing, bent, or cracked clip allows the connector to partially disengage under system pressure.
- Body cracking or deformation — physical impact, overtightening during installation, or long-term thermal cycling can crack the connector body.
- Internal valve failure — a stuck or corroded internal valve may not open fully, restricting refrigerant flow and reducing AC performance even when the connector appears externally intact.
- Contamination — dirt, debris, or moisture entering through a disconnected fitting can damage the valve seat and O-ring sealing surfaces.
Safety Precautions Before Inspecting AC Quick Connectors
AC refrigerant systems operate under significant pressure and contain chemicals that can cause frostbite, eye injury, or asphyxiation if released suddenly. Before beginning any inspection or hands-on testing, observe the following precautions:
- Wear safety glasses and insulated gloves at all times when working near pressurized refrigerant lines.
- Never disconnect a quick connector while the system is pressurized. Always recover refrigerant using certified recovery equipment before removing any connector.
- Work in a well-ventilated area. Refrigerant vapors are heavier than air and displace oxygen at floor level.
- Allow the engine and AC system to cool for at least 15–20 minutes after operation before handling connectors near the compressor or condenser, where temperatures can exceed 80°C.
- Note that R-1234yf is mildly flammable (A2L classification). Keep ignition sources away from the work area when inspecting systems charged with this refrigerant.
Step-by-Step Visual and Physical Inspection
Begin with a thorough visual and manual inspection before using any diagnostic instruments. This step identifies the majority of obvious connector faults and takes less than five minutes per connector.
Check for Oil Staining Around the Connector
Refrigerant systems use PAG or POE oil to lubricate the compressor. When refrigerant leaks past a connector seal, it carries compressor oil with it, leaving a dark, greasy residue or oily film around the connector body and on nearby hose or pipe surfaces. Even a small oil stain the size of a coin is a reliable indicator of a sealing fault. Check both the connector body and a 10–15 cm radius of the surrounding hose and bracket area.
Inspect the Locking Clip
- Confirm the locking clip (retaining ring) is present and fully inserted into its groove around the connector body. A correctly seated clip should sit flush or slightly proud of the connector surface — not angled, partially inserted, or missing.
- Look for cracks, deformation, or discoloration in the clip. Plastic clips that have been exposed to prolonged heat (common near the compressor) become brittle and may fracture even when they appear visually intact.
- Gently attempt to pull the connector apart axially by hand without releasing the clip. A correctly locked connector should show zero axial movement. Any perceptible gap opening under hand-pull force indicates the clip is not engaging the locking groove properly.
Inspect the Connector Body
- Examine the full external surface for cracks, chips, or whitish stress marks in the plastic body. Pay particular attention to the area immediately behind the locking groove, which experiences the highest tensile stress during pressurization.
- Check metallic connectors for corrosion, pitting, or thread damage on the seating faces.
- Verify the connector is fully seated — the male fitting should be inserted to the point where the locking clip snaps, with no visible gap between the male and female body faces. An incompletely inserted connector is a very common cause of slow refrigerant loss.
Refrigerant Leak Detection Methods
Visual inspection alone cannot confirm that a connector is leak-free under operating pressure. Use one or more of the following detection methods to confirm seal integrity.
Electronic Leak Detector
An electronic refrigerant leak detector is the fastest and most sensitive method for locating connector leaks. Heated diode detectors can sense refrigerant concentrations as low as 5 ppm (parts per million), well below the threshold detectable by any other non-laboratory method. With the AC system running and fully pressurized:
- Move the detector probe slowly around the full circumference of the connector at a distance of 5–10 mm from the surface.
- Check below the connector — refrigerant vapors are denser than air and will accumulate in the lowest point near the leak source.
- An audible alarm or flashing LED indicates refrigerant presence. Confirm the alarm triggers at the connector body itself, not from a nearby fitting or hose junction, before concluding the connector is the source.
UV Fluorescent Dye Inspection
Many automotive AC systems are pre-charged with UV fluorescent dye, or dye can be injected using a dye injector kit. Under a UV (black light) lamp, leaked dye fluoresces bright yellow-green, precisely marking the leak location on the connector surface. This method is particularly useful for confirming which specific point on a connector is leaking — the O-ring seat, the body seam, or the locking clip zone.
Manifold Gauge Pressure Observation
Connect a manifold gauge set to the service ports and record the system pressures with the engine off and the system at ambient temperature. As a general reference for a correctly functioning R-134a system at 21°C ambient temperature, static pressure should be approximately 5–6 bar on both high and low sides. If the observed pressure is significantly below this and the system has not been recently serviced, refrigerant loss through a leaking connector or elsewhere in the system is indicated. Monitor the gauge for 5–10 minutes — a falling pressure reading confirms an active leak.
Testing Connector Engagement and Release Function
A connector that is physically intact but not engaging or releasing correctly will either fail to hold pressure or create difficulties during service. Test engagement and release function only after the system has been safely depressurized and refrigerant recovered.
- Test engagement — push the male fitting into the female body until you feel or hear a distinct click from the locking clip. The click must be positive and clear. A soft, indistinct engagement indicates the clip is not seating into its groove, meaning the connector will not hold system pressure reliably.
- Confirm full seating — after engagement, visually confirm the male fitting is flush with or slightly recessed into the female body face. Any visible gap between the two mating faces indicates incomplete insertion.
- Test axial retention — apply firm hand-pull force axially on both sides of the connected fitting. No separation or movement should occur while the clip is engaged. Movement indicates worn locking geometry.
- Test release — operate the release tool or depress the release tabs as designed for the specific connector type. The connector should disengage smoothly and completely with moderate hand force. Excessive force required to release may indicate a swollen O-ring, contamination, or a deformed body bore.
- Inspect O-ring after disassembly — once separated, examine the O-ring on the male fitting for hardening, cracking, flat spots, or extrusion damage. A healthy O-ring should be supple, uniformly round, and free of surface defects. Replace any O-ring that fails this inspection before reassembly.
Diagnostic Summary: Symptoms, Likely Causes, and Actions
| Observed Symptom | Likely Connector Fault | Recommended Action |
|---|---|---|
| Oil staining around connector body | O-ring seal failure or incomplete insertion | Recover refrigerant, inspect O-ring, reseat or replace connector |
| Electronic detector alarm at connector | Active refrigerant leak at seal or body | Confirm with UV dye; replace O-ring or full connector |
| Gauge pressure below specification | Slow leak at connector or elsewhere in system | Leak-test all connectors with detector or dye; repair leak, recharge |
| Locking clip missing or cracked | Connector at risk of disconnection under pressure | Replace clip immediately; retest retention before recharging |
| Axial movement when pulling connected fitting | Worn locking groove or deformed clip | Replace connector assembly; do not return to service |
| Reduced AC cooling with no visible leak | Internal valve not opening fully | Recover refrigerant, disassemble connector, inspect valve seat |
| Connector body cracked or deformed | Physical damage or thermal stress failure | Replace connector — cracked body cannot be repaired |
When to Replace Rather Than Service an AC Quick Connector
Some connector faults can be resolved by replacing the O-ring and reseating the fitting. Others require full connector replacement. Replace the entire connector assembly — not just the O-ring — under the following conditions:
- Any crack in the connector body — cracked plastic or metal bodies cannot safely hold refrigerant pressure and must be replaced immediately.
- Worn or deformed locking groove — if the clip no longer snaps positively or the male fitting moves axially when locked, the body geometry is beyond serviceable limits.
- Continued leakage after O-ring replacement — if a new correctly-sized O-ring still leaks, the sealing face inside the connector bore is damaged or corroded and will not seal against any O-ring.
- Connector age beyond 10 years or 150,000 km — plastic connector bodies and internal valve springs degrade over time regardless of visible condition. In high-mileage vehicles, proactive replacement during major AC service (compressor or evaporator replacement) is cost-effective preventive maintenance.
Always install new O-rings lubricated with clean, system-compatible PAG or POE oil when reassembling any AC quick connector. Never reuse an O-ring that has been under system pressure, even if it appears undamaged — compression set from previous seating means it will not seal as reliably as a new ring.
-

Air conditioning copper pipe duoble connector are core fittings for connecting t...
-

Air conditioning copper pipe female-male connector are core fittings for connect...
-

The air conditioning refrigerant filling tool is a professional repair accessory...
-

The cartridge-type sight glass is a visual monitoring component for refrigeratio...
-

Air conditioning pipe bandage strip is used to secure and protect the pipes conn...
-

The brass refrigerant distribution liquid separator is a core component of refri...
Contact Us
-

No. 109 Jiefang Road, Diankou Town, Zhuji City, Shaoxing, Zhejiang Province
-

+86-13867581196
-

Copyright © shaoxing DingSen Refrigeration Technology Co Ltd. All Rights Reserved
OEM Refrigeration Parts Manufacturer Custom Automotive AC Parts Factory